Instructions to Build an Ionic Silver Generator.
I have found Ionic Silver to be beneficial to my health, your experience may vary. This Instructional has been placed here to document how I created it. It may not work for you for a variety of reasons and taking it may not be good for you. That is for your doctor to decide. I am not a doctor or health professional and everything stated here is based on my experience as a non-professional. If you have any doubts or reservations Click Here and decide for yourself.
I searched the web quite extensively and read many pages of ionic silver manufacturers, government sites, doctors sites, as well as other sites showing the different ways to build your own.
This ionic silver generator works slowly over 3-4 days and requires a basic electronic knowledge of how to use a multimeter along with a few simple parts. The parts list is:
1- A 12-15 VDC Voltage source
2- A Canadian Maple Leaf $5 piece .9999 Pure Silver
3- An aquarium air pump with 2 feet of clear plastic hose attached
4- A 1 quart glass jar with a plastic lid
5- 2 electrical clip leads
6- Distilled Water
7- Hanna PWT Conductivity Tester (Optional)
8- Multimeter to measure 1.8 milliamps DC
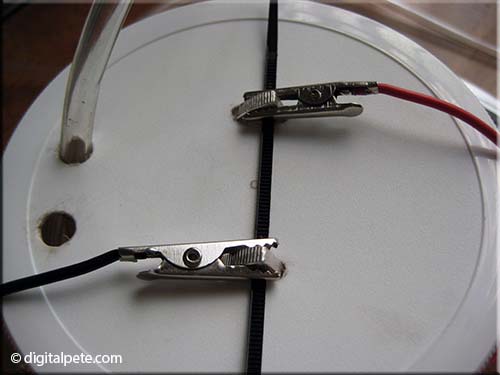
The quick story is you make 2 small holes 1/4 inch from the edge of the plastic lid, one for the air tube to fit snuggly through and the second one to let air out. Take the silver coin and cut it in half with a hacksaw. Now you create 2 small slots about 1.5 inches apart in the center of the plastic lid for the jar, to just fit the tips of these coin halves through. Then you drill 2 small holes near the top edge of each coin half as shown in picture below. Once that's done you can slip a wire tie or other insulated material to hold them in place. You will have to remove these after electrolysis to clean them, so don't make it permanent.
Fill the glass jar with distilled water, bring water to within 1/4 inch from the top. It must be distilled, reverse osmosis water will not work. If you have the Hanna PWT Tester, distilled water will measure 1-2uS. Reverse Osmosis water will measure 20uS, not suitable. Screw the plastic top with coin halves attached into the glass jar. Now you connect 12-15 Volts DC across the 2 coin halves via clip leads. Plug in your aquarium air pump and push the tube through one of the holes you made in the plastic lid, push it all the down to near the bottom of the jar.
At this point you are starting to make silver ions in the distilled water. In the beginning, very little current will be flowing, but after a while it will increase. Be sure to swap polarity on the coins every 12 hours or so. Check the current flow every 12 hours as well. When you measure about 1.8 milliamps, you may have a usable product. According to some manufacturers website, they found that a Hanna PWT reading of 35uS approximately equates to 22 ppm. When my water reached 35uS, my current draw was 1.8 milliamps. Well before current draw reaches 1.8 milliamps, you may see tiny specks of silver floating on top of the water, and a medium grey material floating or settling on the bottom. These are likely silver oxide and are part of the creation process. When you decide it is finished, filter the water through 2 paper coffee filters, twice. Store it in a cool dark place. I use a brown glass small necked quart bottle for storage and follow usage directions for Sovereign Silver, since it is close in ppm to what may be produced here. My water remained crystal clear through out the entire process. See pictures below for contruction details.
UPDATE: 1 month later I poured out 4 oz of this ionic silver into a cup to test for stability, and found the Hanna PWT meter now reads 54uS, and the color of the liquid has changed to a very light yellow. This may approximate to about 36 ppm. Also the liquid now has a very slight metallic taste where as before it had no taste.

1 Quart Glass Jar
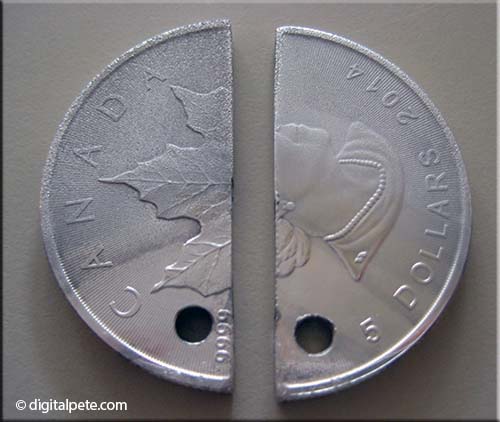
Silver Coin Detail
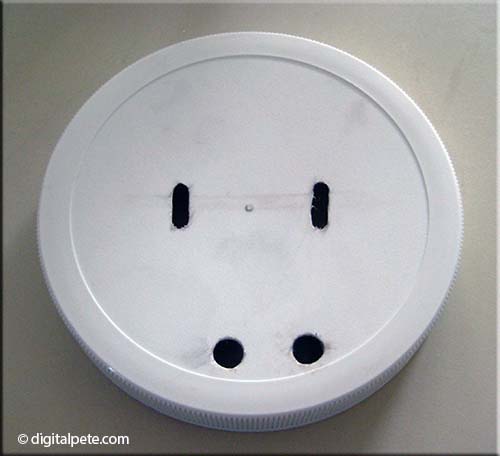
Holes in Plastic Top

Wire tie holding silver in place
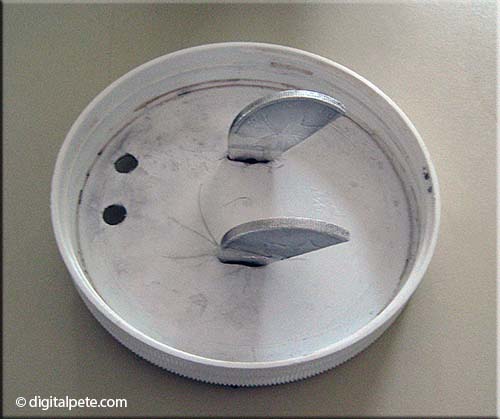
Underside of Top showing silver
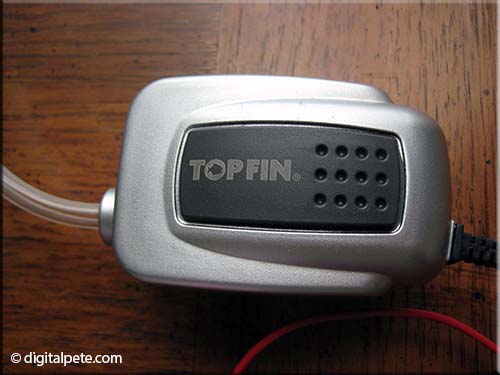
$10 Air Pump with tubing (usually sold separately)
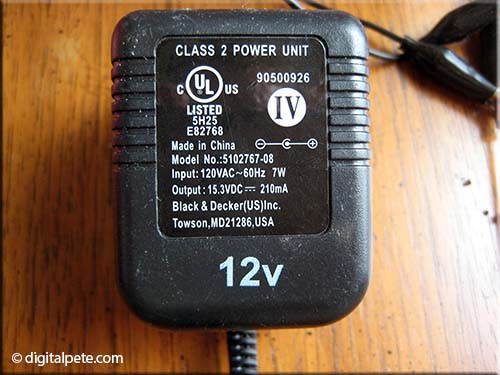
Plug in power supply from an cordless drill
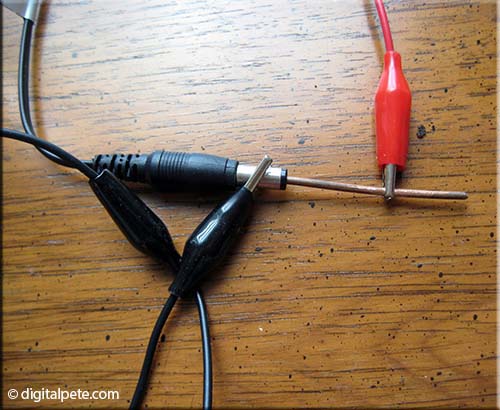
Detail of connecting clip leads to power supply
Electricity and Air Detail
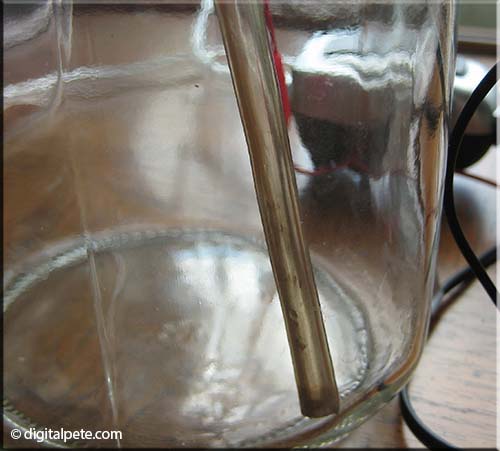
Airhose detail
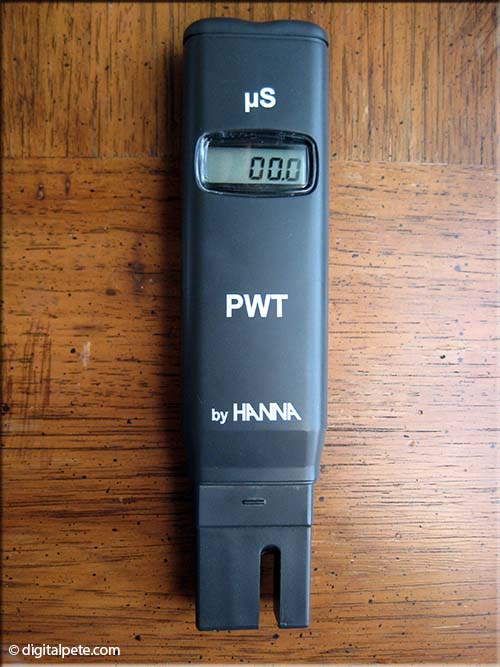
Hanna PWT Water Tester
|
|